Raw Output Evaluator Help
Introduction
Raw Output Evaluator is a tool designed to allow students, researchers and industry practitioners to compare the raw outputs from different machine translation engines, both to each other and to other translations of the same source text, and carry out comparative human quality assessment using standard industry metrics. The same program can also be used as a simple post-editing tool and to compare the time required to post-edit MT output with how long it takes to produce an unaided human translation thanks to a built-in timer.
It was first developed for a postgraduate course module specifically aimed at teaching the use of machine translation and post-editing, designed as part of the Master’s Degree in Specialist Translation and Conference Interpreting at the International University of Languages and Media (IULM), Milan, Italy.
It was presented to the public for the first time during a workshop at the 40th edition of the annual Translating and the Computer Conference in London in November 2018. A full paper was published in the proceedings.

Menus
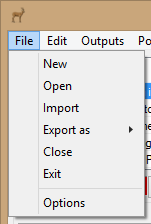
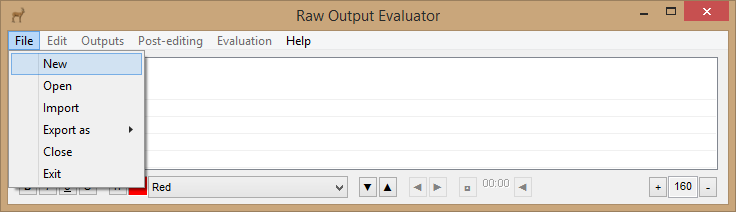
New
The user may create a new Raw Output Evaluator project file (.roe).
Open
The user may open an existing Raw Output Evaluator project file (.roe).
Import
The user may create a new Raw Output Evaluator project file (.roe) and populate it with data imported from various common file types used by CAT tools:
- XML Localisation Interchange File Format (XLIFF)
- Source text plus one target text.
- Specimen file
- Translation Memory eXchange (TMX)
- Source text plus one target text.
- Specimen file
- Standard comma separated file (.csv)
- The field separator must be a comma, and not a semicolon or other character.
- Source text plus up to four target texts.
- Specimen file
- Microsoft Excel (.xlsx and .xls)
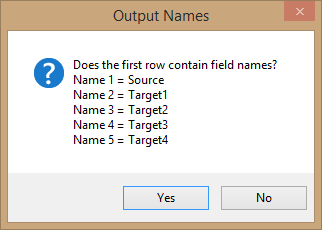
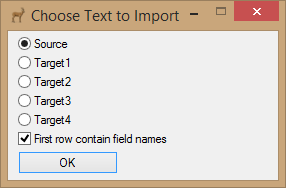
In the case of comma separated and Microsoft Excel files, the user is asked if the first row contains field names.
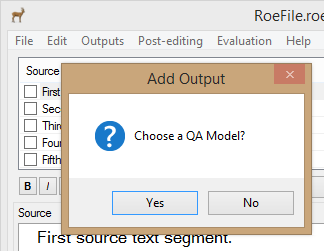
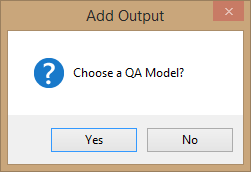
After the file has been imported the user is asked to choose a QA model if they wish.
Export as
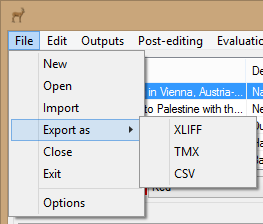
The user may export data from the currently open Raw Output Evaluator project file (.roe) to various common file types used by CAT tools:
- XLIFF (XML Localisation Interchange File Format)
- Source text plus up to four target texts.
- Specimen file
- TMX (Translation Memory eXchange)
- Source text plus up to four target texts.
- Specimen file
- CSV (Comma separated file)
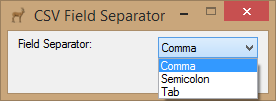
- The user is asked to specify the field separator (comma, semicolon or tab).
- Source text plus up to four target texts.
- Specimen file
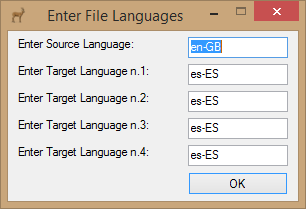
In the case of XML Localisation Interchange File Format and Translation Memory eXchange files, the user is asked to specify the languages of each output.
In the case of Comma separated files, the user is asked to specify the character used to separate the fields.
Close
The user may close the currently open Raw Output Evaluator project file (.roe)
Exit
The user may quit Raw Output Evaluator.
Options
The user may edit some of the program settings.

Score Processing URL
The URL of the web app used for calculating total aggregate scores.
Identical Segment Colour
The font colour used to mark all the segments in common between two outputs (Outputs>Mark Output Segments Identical to).
Maximum Sample Size (segments)
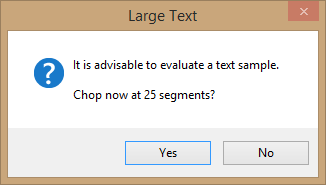
The tool is not designed to be used with very long texts (max. 25 segments by default) and performs badly if loaded with excessive data; it is not intended for use by professional translators or post-editors, but as a teaching tool.
Segmentation punctuation
The user may edit the list of punctuation marks Raw Output Evaluator considers as end-of-segment markers when outputs are pasted into the tool.
Do not segment on return
The user may tell Raw Output Evaluator not to segment text at Line Feeds and Carriage Returns when outputs are pasted into the tool.
Abbreviations
The user may type in exceptions to the segmentation rules, separated by spaces. In the example shown in the figure above, Raw Output Evaluator will not segment the text after the full stops at the end of Mr. and Dr.
Settings File
The file containing the tool settings may be moved to a different folder if required.
The edit menu can also be reached by right clicking any of the segment edit boxes.
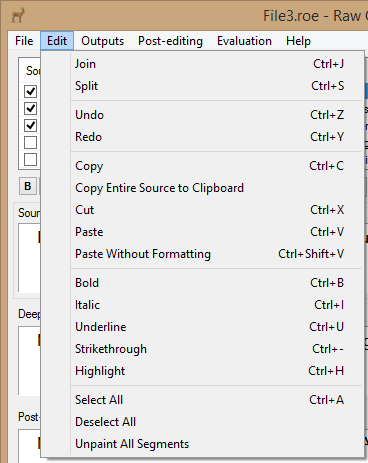
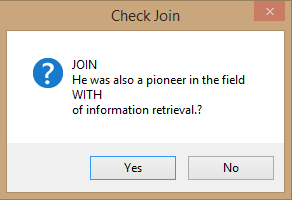
Join
The user may join two incorrectly split segments: place the cursor in the edit box of the first of the two segments to be joined and choose this function. The function can also be launched with the keyboard shortcut Ctrl+J.
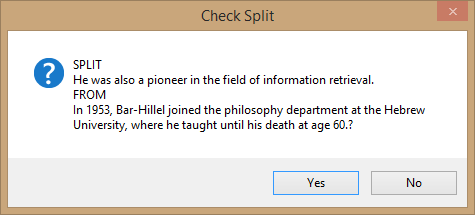
Split
The user may split a segment into two: place the cursor in the segment edit box in the exact position where the segment is to be split and choose this function. The function can also be launched with the keyboard shortcut Ctrl+S.

Undo
The user may reverse their last action. The function can also be launched with the keyboard shortcut Ctrl+Z.
Redo
The user may reverse their last Undo. The function can also be launched with the keyboard shortcut Ctrl+Y.
Copy
The user may copy the text selected in the active segment edit box. The function can also be launched with the keyboard shortcut Ctrl+C.
Entire Source to Clipboard
The user may copy the entire source text to the Windows Clipboard.
Cut
The user may cut text the text selected in the active segment edit box. The function can also be launched with the keyboard shortcut Ctrl+X.
Paste
The user may paste text into the active segment edit box. The function can also be launched with the keyboard shortcut Ctrl+V.
Paste Without Formatting
The user may paste text into the active segment edit box without formatting. The function can also be launched with the keyboard shortcut Ctrl+Shift+V.
Bold
The user may bold any text selected in the active segment edit box. The function can also be launched with the keyboard shortcut Ctrl+B.Italic
The user may italicize any text selected in the active segment edit box. The function can also be launched with the keyboard shortcut Ctrl+I.Underline
The user may underline any text selected in the active segment edit box. The function can also be launched with the keyboard shortcut Ctrl+U.Strikethrough
The user may strike through any text selected in the active segment edit box. The function can also be launched with the keyboard shortcut Ctrl+-.Highlight
The user may highlight any text selected in the active segment edit box with the previously selected colour. The function can also be launched with the keyboard shortcut Ctrl+H.Select All
The user may select all the text in the currently active segment edit box. The function can also be launched with the keyboard shortcut Ctrl+A.
Deselect All
The user may deselect all the text in the currently active segment edit box.
Unpaint All Segments
The user may remove all highlighting from all the segments in the entire project.

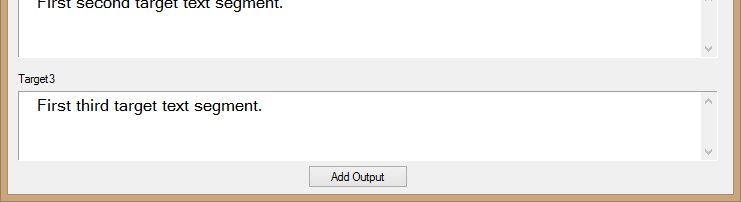
Add Output
The user may add a new column of text (e.g. the raw output from an MT engine) to the Raw Output Evaluator project file.Rename Output
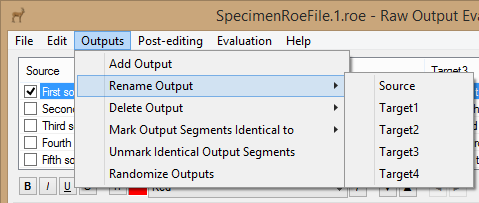
The user may rename a column of text in the Raw Output Evaluator project file.
Delete Output
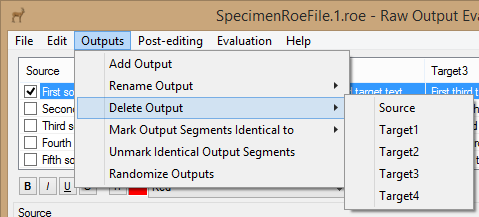
The user may remove a column of text from the Raw Output Evaluator project file.
Mark Output Segments Identical to
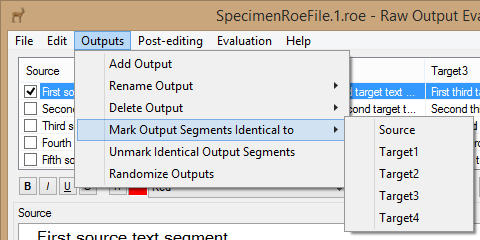
The user may mark all the segments in common between two outputs with a previously selected font colour. The colour is selected in the program options Edit>Options.
Unmark Identical Output Segments

The user may unmark all the segments in common between two outputs. The font colour returns to normal.
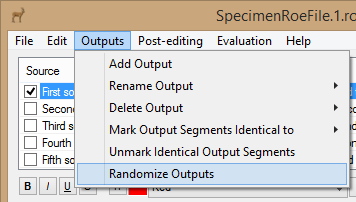
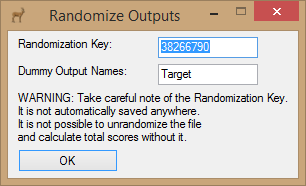
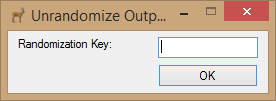
Randomize/Unrandomize Outputs
The user may randomize the target outputs so that evaluators are not able to identify the MT engines used. Take careful note of the Randomization Key. It is not automatically saved anywhere. Without it, it is not possible to unrandomize the file and calculate total scores. If you try to unrandomize the file using the wrong key, you will get no error message and the file will apparently have been unrandomized. It will however not have been unrandomized correctly and the file will no longer be unrandomizable.
Post-edit
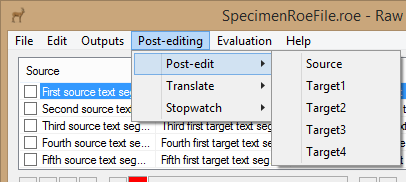
The user may add a new column of text, called Post-edited [selected column], which is an identical copy of the column selected. This new column may then be post-edited. When the new column is created, the user is asked if they would like to enable the stopwatch control buttons.
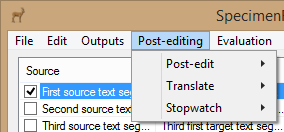
Translate
![]()
The user may add a new empty column of text called Translated [selected column]. This new column may then be used to produce an unaided human translation. When the new column is created, the user is asked if they would like to enable the stopwatch control buttons.
Stopwatch
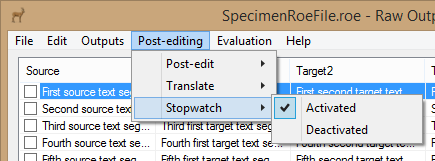
The user may enable/disable the stopwatch control buttons. This is only possible after either the Post-edit or Translate items have been chosen from the Post-editing menu.

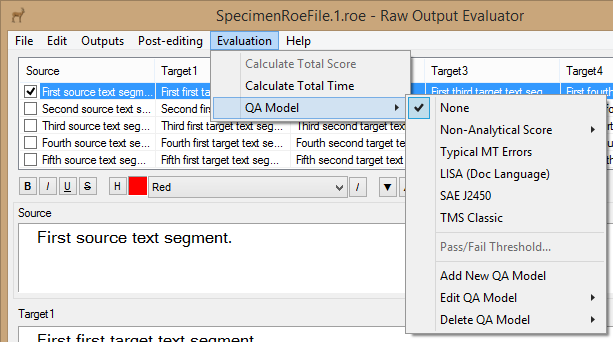
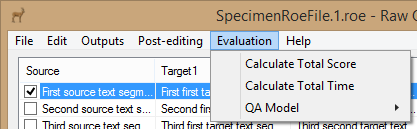
Calculate Total Score
The user may calculate the total evaluation score according to the QA model chosen.
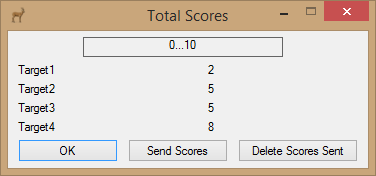
The user may send the scores to a predefined URL for result aggregation, or delete scores previously sent to the same URL.
Calculate Total Time
The user may calculate the total time spent editing/translating the segments.
Export Scores
The user may export the scores in CSV format for external processing.
QA Model
The user may choose the QA model they wish to use for human assessment of the raw MT output/human translation, edit or add a new QA model.
None
No QA model is applied.
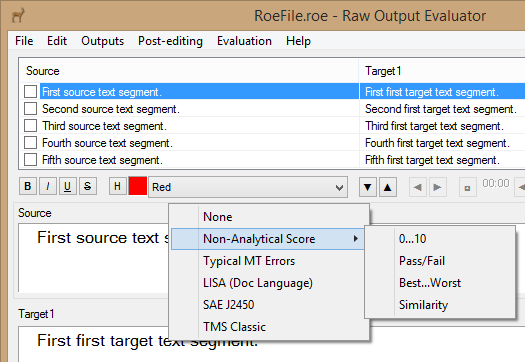
Non-Analytical Score
The use may choose a non-analytical scoring model.
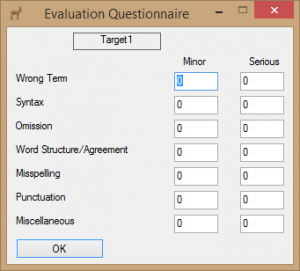
Typical MT Errors
The model provided by default is based on the error types defined by Federico Gaspari in Gaspari et al. (2011) and completed with three types based on the observations of Esperança-Rodier et. al (2017) regarding unknown word errors. The user may of course edit or delete the model.
LISA (Doc Language)
The tool comes with a QA model based on the Doc Language part of the Localization Industry Standards Association QA metric preinstalled. The user may of course edit or delete the model.
SAE J2450
The tool comes with a QA model based on the Society of Automotive Engineers J2450 QA metric preinstalled. The user may of course edit or delete the model.
TMS Classic
The tool comes with a QA model based on the SDL Translation Management System Classic QA metric preinstalled. The user may of course edit or delete the model.
[Other QA models]
The user may have defined their own QA models.
Pass/Fail Threshold…
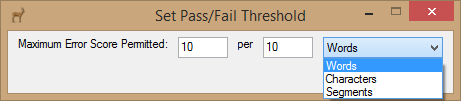
The user may set a threshold score below which the segment is considered to have failed the QA test.
Add New QA Model
The user may define their own QA models.
Edit QA Model
The user may edit an existing QA model.
Delete QA Model
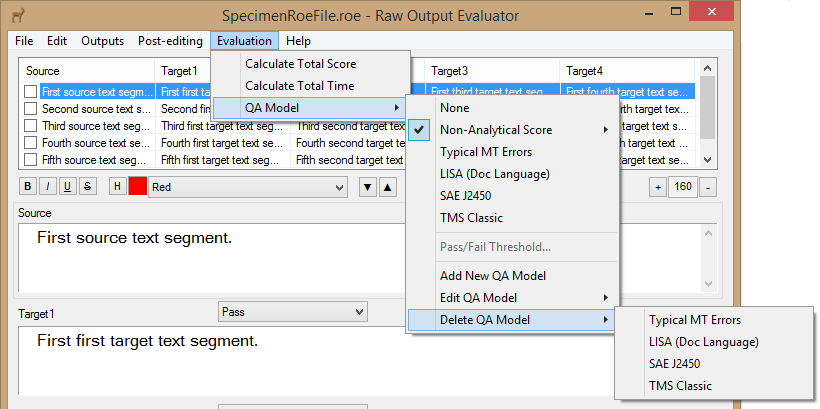
The user may delete an existing QA model.
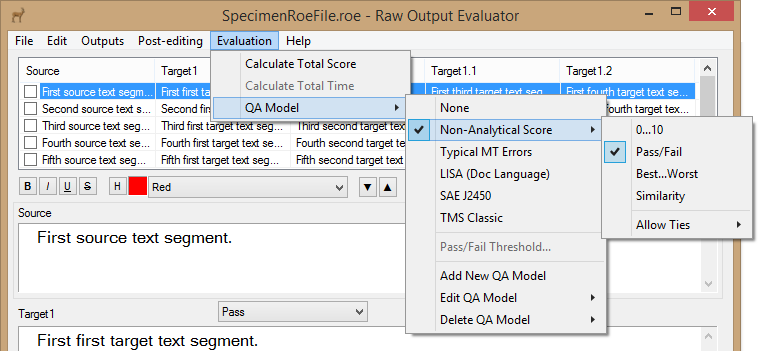
0…10
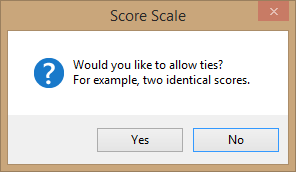
The user may assign a score of from 0 to 10 to each segment. The user is then asked if they wish to allow ties (see Allow Ties below).
Pass/Fail
The user may decide if each segment passes or fails their subjective judgement.
Best…Worst
The user may decide which segment is the best, second best, third best and worst. The user is then asked if they wish to allow ties (see Allow Ties below). This QA model is only available for up to a maximum of four target outputs.
Similarity
The user may judge the similarity of the output to another (ignore, different, similar, almost identical, identical).
Allow Ties
The user may decide if the same score may be assigned to two different segments.

Help
The function can also be launched with the keyboard shortcut F1.
Check for Updates
The user may check to see if a more recent version of Raw Output Evaluator can be downloaded from the Web.
About
The user may display information regarding the licence, copyright and credits.

List View

The names of the source text column and four displayed target text columns are shown.
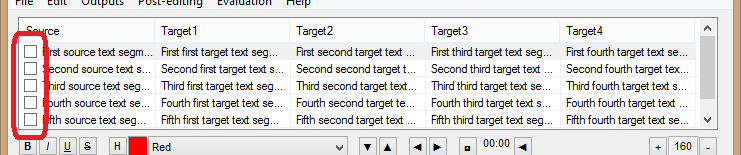
The user may confirm/unconfirm the corresponding segment. If a QA model has been chose that involves a score questionnaire, the questionnaire will appear for each target output segment when it is confirmed.
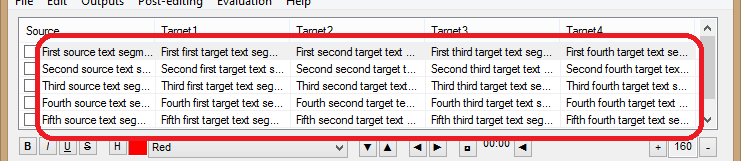
The first few words of five segments of each text column are shown, including the current segments.

Tool Bar

B
The user may bold any text selected in the active segment edit box. The function can also be launched with the keyboard shortcut Ctrl+B.I
The user may italicize any text selected in the active segment edit box. The function can also be launched with the keyboard shortcut Ctrl+I.U
The user may underline any text selected in the active segment edit box. The function can also be launched with the keyboard shortcut Ctrl+U.S
The user may strike through any text selected in the active segment edit box. The function can also be launched with the keyboard shortcut Ctrl+-.
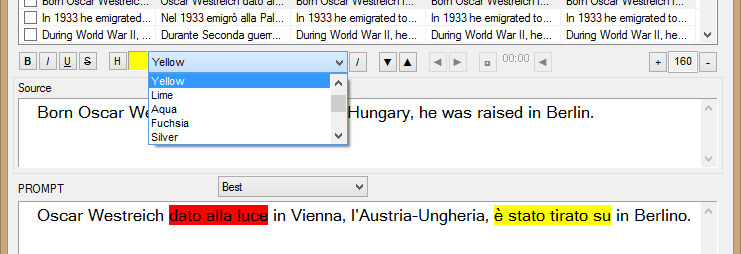
H
The user may highlight any text selected in the active segment edit box with the previously selected colour. The function can also be launched with the keyboard shortcut Ctrl+H.Colour Dropdown List Box
The user may select the highlighting colour to apply (Ctrl+Shift+H or Ctrl+Shift+1). The dropdown list may show a list of error categories if a QA model has been selected.
/
The user may edit an error category on the fly. If no QA model has been selected, the user is also asked to create one by giving it a name.
Otherwise the user is warned that they are about to change the name of an error category in an existing QA model.

▼
The user may confirm the current segment and move onto the next one. If a QA model has been chose that involves a score questionnaire, the questionnaire will appear for each target output segment (see below). This function can also be launched with the keyboard shortcut Alt+Down.
▲
The user may confirm the current segment and move back to previous one. If a QA model has been chose that involves a score questionnaire, the questionnaire will appear for each target output segment. The function can also be launched with the keyboard shortcut Alt+Up.

These buttons are only active if the Raw Output Evaluator project file has more than five parallel texts (e.g. a source text plus more than four raw outputs).
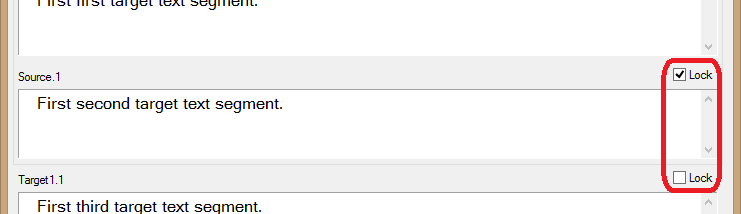
◄
The user may display the previous block of segment edit boxes. The size of the block is defined by the lock check boxes which may only be set when the first block of segment edit boxes is displayed. The function can also be launched with the keyboard shortcut Alt+Left.
►
The user may display the next block of segment edit boxes. The size of the block is defined by the lock check boxes which may only be set when the first block of segment edit boxes is displayed. The function can also be launched with the keyboard shortcut Alt+Right.

□
The user may start/stop the stopwatch. If the stopwatch is not stopped before moving onto a new segment, it automatically starts again in the new segment.
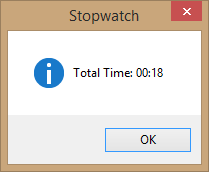
00:00
This display shows the time spent editing/translating the current segment. In order to calculate the total time spent editing/translating the entire text, choose Calculate Total Time from the Evaluation menu.
◄
The user may reset the stopwatch. If the stopwatch is not stopped before resetting, it automatically starts again from zero.

+
The user may increase the size of the font used to display the text in the segment edit boxes.
000
This number is the current size of the font used to display the text in the segment edit boxes.
–
The user may decrease the size of the font used to display the text in the segment edit boxes.
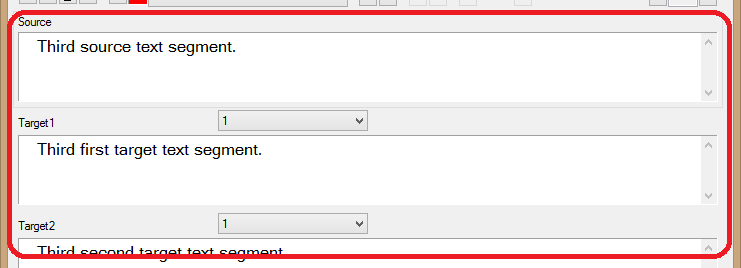
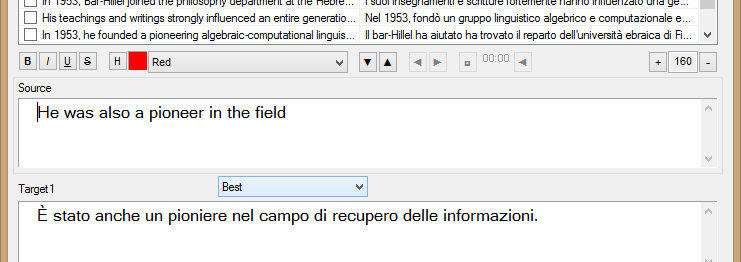
Segment Text Boxes

The user may edit the source segment in this box, or highlight parts of the text which have not been translated correctly by the MT engines according to the QA model chosen. The user is not obliged to have a source text and may use the source text column for an output (target) text if they wish for blind post-editing exercises.

The user may edit the target segment in this box, or highlight parts of the text which have not been translated correctly by the MT engines according to the QA model chosen. Empty edit boxes may be created for an unaided human translation of the source text by choosing the column to be translated from the Translate item on the Post-editing menu.
This list box is only displayed if a Non-Analytical QA scoring model is selected on the QA Model submenu of the Evaluation menu. The user simply chooses the score they want to give to the corresponding target segment from the dropdown list box. The boxes can be reached by pressing Ctrl+Shift+2…5 (Ctrl+Shift+1 moves the focus onto the Colour Dropdown List Box since the first output – normally called Source – has no score dropdown list box).

To calculate the total score of the entire text of the output columns, choose Calculate Total Score from the Evaluation menu.
Note that only confirmed segments will be included in the total score. To confirm segments use the Next/Previous Segment Buttons (Alt+Down/Alt+Up) or the List View Check Boxes.

The scores can then be sent to a server for aggregation.
This check box is only displayed if the Raw Output Evaluator project file has more than five parallel texts (e.g. a source text plus more than four raw outputs).
This button is only displayed if the Raw Output Evaluator project file has less than five parallel texts (e.g. a source text plus less than four raw outputs). The user may add a new column of text (e.g. the raw output from an MT engine) to the Raw Output Evaluator project file.
How To...
Standard installation
- Download and run the installation package (Roe-installer.exe).
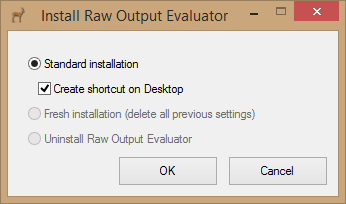
- Choose if you would like to create a Desktop shortcut.
- Click OK.
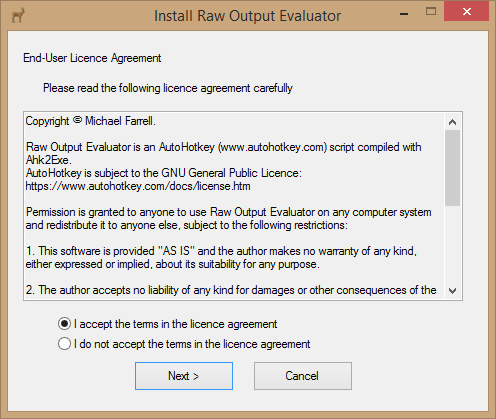
- Read the End-User Licence Agreement.
- Choose I accept the terms in the licence agreement if you agree with them.
- Click Next>.
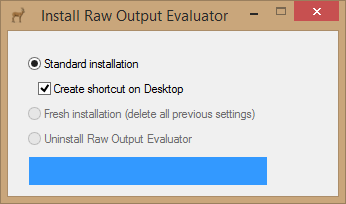
- When installation is complete the tool will open automatically.
Updating
- Download and run the installation package (Roe-installer.exe).
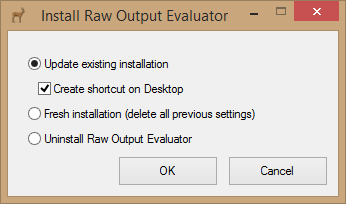
- Choose if you would like to create a Desktop shortcut.
- Choose if you would like to reinstall the program and delete all previous settings (Fresh installation).
- Click OK.
- Follow the instruction for Standard installation above from point 4.
Advanced Installation
The Raw Output Evaluator settings file (RoeSettings.ini) is automatically installed in %AppData%\Raw_Output_Evaluator\. The tool will also work correctly if the settings file is in the same folder as the executable (Raw_Output_Evaluator.exe). If you wish to move the settings file to another folder, you can create a registry key (HKEY_CURRENT_USER, Software\RawOutputEvaluator\SettingsFolder) whose value is the full path of the folder you wish to use. Remember to move the settings file (RoeSettings.ini) to this new folder. The settings file can also be moved after installation on the Options window (Edit>Options).
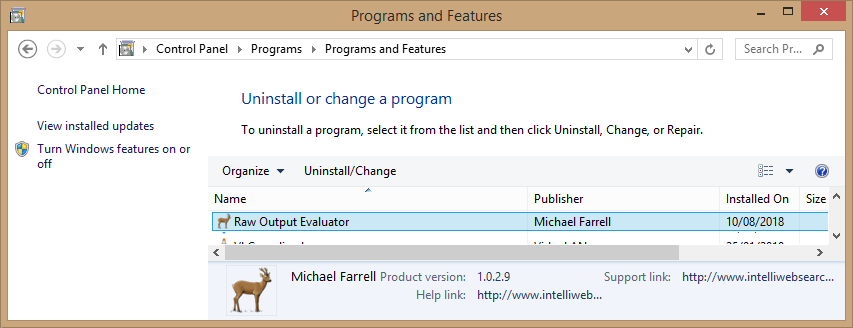
The tool can be uninstalled from the Windows control panel, like any other standard Windows program.
Alternatively you can download and run the installation package (Roe-installer.exe), and choose uninstall from the installation package menu.
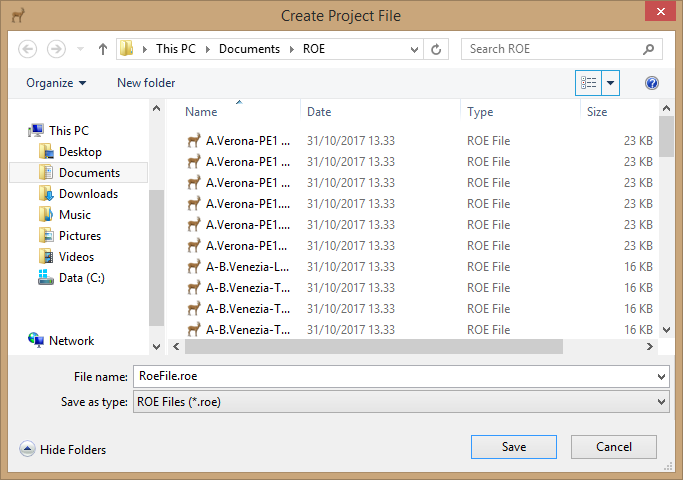
- Choose New from the File menu.
- Choose an appropriate name for the project file and save it.
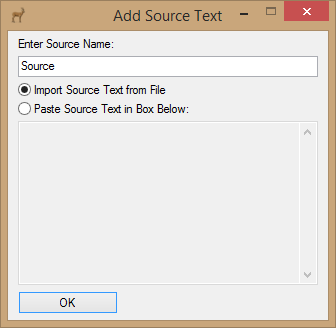
- The Add Source Text window appears.
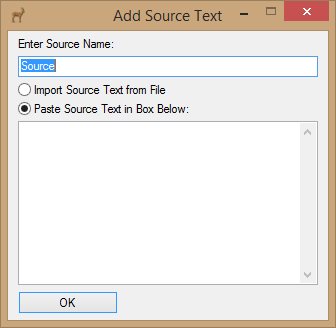
- Enter an appropriate name for the source text.
- The user may then either paste in the source text or import it from a file (see below). For blind post-editing exercises, raw MT output may be pasted in or imported instead of a source text.
Paste in Source Text
- Simply paste the text from the Windows Clipboard into the space provided.
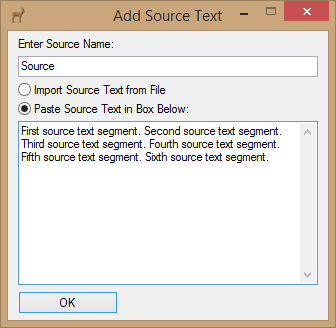
- Click OK.
- The user is asked if they are ready to add the first raw MT output to the project (target text). If you are not ready, click No and use the Add Output button at the bottom of the screen later. Otherwise click Yes.

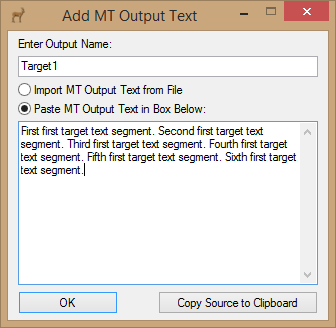
- The Add MT Output Text window appears.
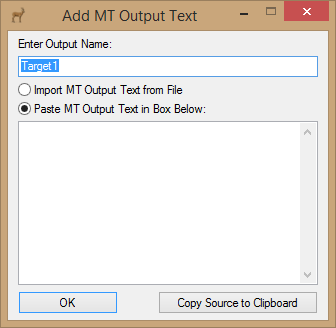
- Enter an appropriate name for the target text.
- The user may then either paste in the target text or import it from a file (see below).
Paste in Target Text
- Simply paste the text from the Windows Clipboard into the space provided.
- The user is asked if they want to choose a QA model. You may click No and choose one later. Otherwise click Yes.
- Choose an appropriate QA model for the kind of evaluation you wish to perform.
- The Raw Output Evaluator file is now ready for use.
Import Source Text from file
The text may be imported from several kinds of file:- Tabular files with any number of columns, such as:
- Another Raw Output Evaluator project file (.roe)
- A standard comma separated file (.csv)
- The field separator must be a comma, and not a semicolon or other character.
- A Microsoft Excel file (.xlsx and .xls)
- Microsoft Excel must be installed on the PC.
- The worksheet with the data to be imported must be the active one.
- A plain text file (.txt).
- Files which may be opened with Microsoft Word.
- Microsoft Word must be installed on the PC.
- Raw Output Evaluator has been tested with Microsoft Word document files (.doc and .docx), Rich Text Format files (.rtf) and Hypertext Markup Language files (.htm and .html). In theory it should work with all file types Microsoft Word is able to read.
- Choose Import Source Text from File.
- Click OK.
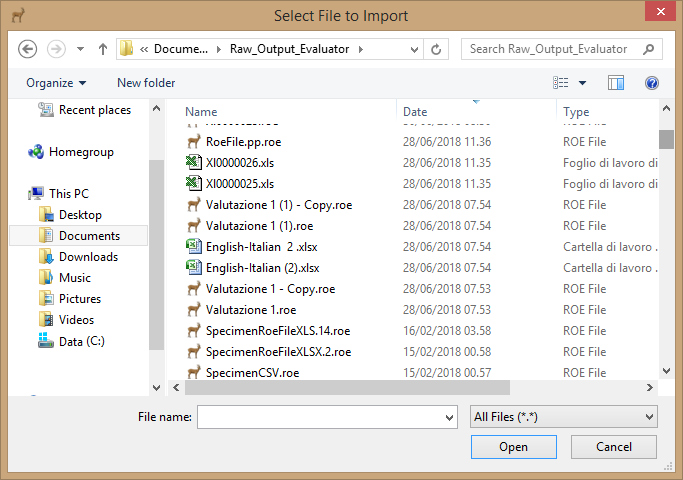
- Select the file to import.
- In the case of a tabular file, choose the text column to import, indicate if the first row contains the field names, and click OK.
- Proceed as per paste method.
- Click the Add Output button (if displayed) or choose Add Output from the Outputs menu.
- The Add MT Output Text window appears.
- Enter an appropriate name for the output text.
- The user may then either paste in the text or import it from a file (see below).
Paste in Output Text
- Simply paste the text from the Windows Clipboard into the space provided.
-
- Click OK. If the user pastes in a text which is longer than the maximum set in the tool settings (Edit>Options), they will be asked if they would like to truncate the text or continue anyway. For most classroom experiments and activities, short sample texts are advisable.
- The user may be asked if they would like to choose a QA Model if they have not already done so.
Import Output Text from file
The text may be imported from several kinds of file:- Tabular files with any number of columns, such as:
- Another Raw Output Evaluator project file (.roe)
- A standard comma separated file (.csv)
- The field separator must be a comma, and not a semicolon or other character.
- A Microsoft Excel file (.xlsx and .xls)
- Microsoft Excel must be installed on the PC.
- The worksheet with the data to be imported must be the active one.
- A plain text file (.txt).
- Files which may be opened with Microsoft Word.
- Microsoft Word must be installed on the PC.
- Raw Output Evaluator has been tested with Microsoft Word document files (.doc and .docx), Rich Text Format files (.rtf) and Hypertext Markup Language files (.htm and .html). In theory it should work with all file types Microsoft Word is able to read.
- Choose Import MT Output from file.
- Click OK.
- Select the file to import.
- In the case of a tabular file, choose the text column to import, indicate if the first row contains the field names, and click OK.
- The user may be asked if they would like to choose a QA Model if they have not already done so.
Sending scores to the server
To calculate the total aggregate scores, you have to create a web app on the server to manage the data. An example app written in Classic ASP can be downloaded from here (see details below). If you create the app and set the web app URL in the settings (Edit>Options), the students can then click Send Scores on the Total Scores window to send their ratings to the server.
A window then appears where they have to define the order of the MT engines so that the server adds the right scores together.
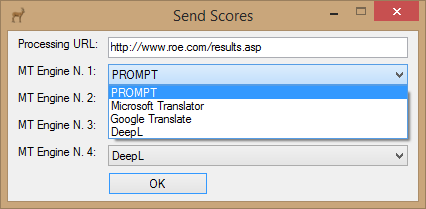
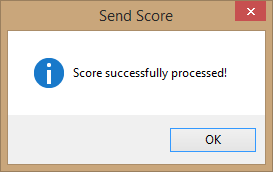
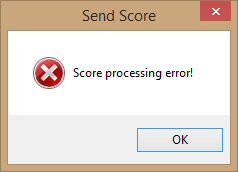
If everything works, they see a Score successfully processed message. Otherwise they will receive an error message.
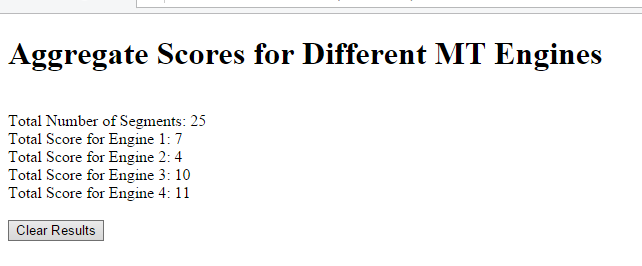
Once all the students have sent their scores, the lecturer’s special web page displays the overall class rating (the page may need refreshing).
Example score aggregation web app
Raw Output Evaluator adds the following query to the processing URL (http://your-domain-name/path-to-your-web-app/your-web-app-name):
- ?SwID=[SwID]&length=[MaxSegment]&target1=[TotScore1]&target2=[TotScore2]&target3=[TotScore3]&target4=[TotScore4]
Where:
- SwID is a random number generated by the tool the first time scores are sent. This number then remains fixed so that previously sent scores may be edited or deleted.
- MaxSegment is the total number of segments in the text being analysed.
- TotScore1, TotScore2, TotScore3 and TotScore4 are the total scores for the four MT engines under analysis. The query may be shorter if scores from less than four MT engines are sent.
If you wish, you may adapt or use this example web app written in Classic ASP. It consists of three files:
- scores.asp: the score processing app
- results.asp: the lecturer’s result page
- scores.mdb: a Microsoft Access format database for storing the scores.
On the fly
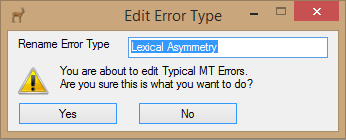
The user may edit an error category on the fly by clicking the [/] button (among the highlighting buttons). If no QA model has been selected, the user is also asked to create one by giving it a name.
Otherwise the user is warned that they are about to change the name of an error category in an existing QA model.
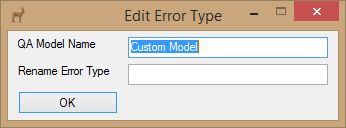
Edit QA Model
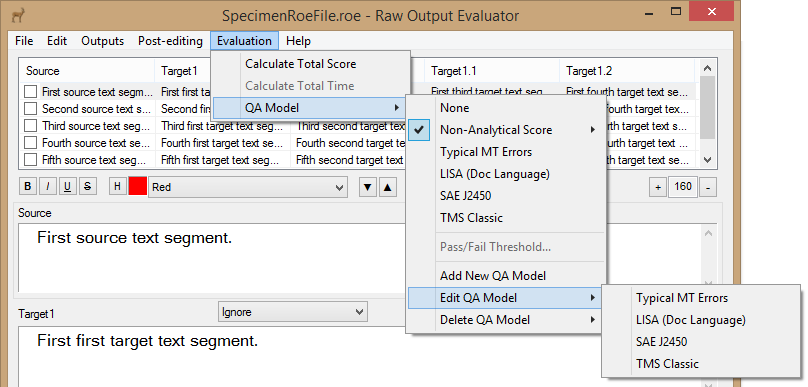
The user may edit an existing QA model.
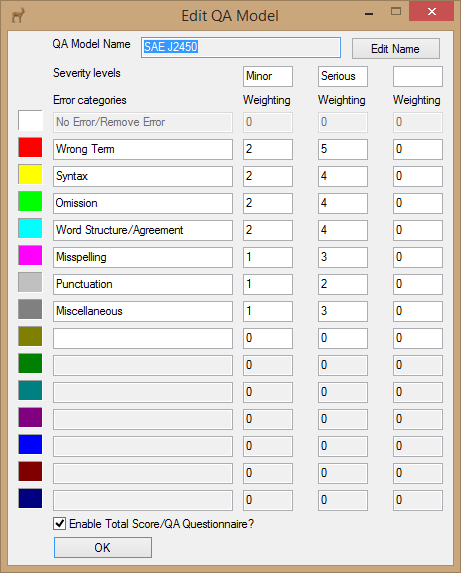
QA Model Name
The name of the QA model being edited. The name itself may only be edited after clicking the Edit Name button.
Edit Name
The user has to click this button if they wish to edit the name of the QA model. Any ROE project files associated with the QA model before the name is changed will no longer work correctly.
Severity levels
The user may define up to three severity levels for each error category, such as Minor, Major and Critical.
Error categories
Each error category is entered on a separate line associated with a colour. No blank lines should be left between items.
Weighting
This is a factor by which the error score is multiplied when calculating the total score. A different weighting may be entered for each severity level defined.
Enable Total Score/AQ Questionnaire?
The user may decide that it makes no sense to calculate a total score for the model, and therefore disable the QA questionnaire which would otherwise appear for each segment when it is confirmed. The predefined Typical MT Errors model is set up with the QA questionnaire disabled by default.
Add New QA Model
The user may define their own QA models (Evaluation>QA Model>Add New QA Model).
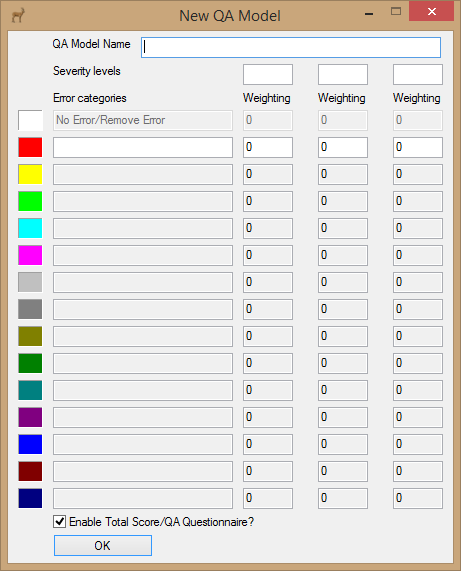
The various items on the window have the same meaning as for Edit QA Model above.
Example Activities
The aim of the activity is to compare four free online MT systems: PROMPT Online-Translator (a hybrid rule-based/statistical MT system), Yandex Translate (a statistical MT system), Google Translate (a neural MT system), and DeepL (a neural MT system). Students are expected to find some similarities between PROMPT and Yandex, and some between Google Translate and DeepL.
The activity can stop at slide n. 34 (Total Score). To calculate the Overall Class Rating (slide n. 35 onward), you have to install the web app described under How to calculate total aggregate scores.

IntelliWebSearch
 IntelliWebSearch is designed to save translators, interpreters, editors and terminologists time when searching the web. Pressing a convenient shortcut key copies selected text from your translation environment, opens your browser and sends the copied text to any number of search engines, on-line dictionaries or on-line encyclopaedias together with other customizable instructions.
Not just translation… transcreation!
 Engaging copy translated literally from Italian into English, without taking account of differences in linguistic, semantic and cultural expressions, at best leaves much to be desired and at worst provokes hysterical laughter.